External wall insulation beads: which trim goes where
12 October 2026 · All4Building.ie team
Why the trim matters as much as the board
Most of the attention on an external wall insulation job goes on the board thickness and the render colour. The trims get rushed, and they are the bit that fails first. A corner with no bead cracks the first time someone brushes past it with a wheelbarrow. A window with no drip bead lets water run back under the render and into the reveal. None of these trims cost much on their own, but using the wrong one, or skipping one, is the most common reason a finished wall needs patching within a year.
Work out your trim list at the same time as your board and render order, not as an afterthought once the boards are already up.
The trims, and where each one goes
| Location on the wall | Trim | What it does |
|---|---|---|
| Bottom of the wall, above ground level | EPS Starter Track | Carries the weight of the first row of boards and keeps the bottom edge straight and level |
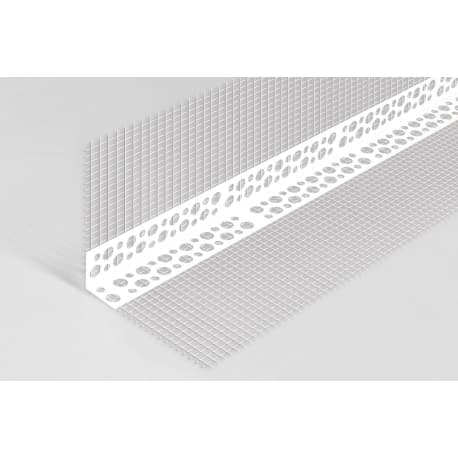
| External (outward-facing) corners | PVC Corner Bead with Mesh | Protects the corner from knocks and keeps it a true right angle under the basecoat |
| Termination edges - where render meets a different finish, a roof line, or ground level | PVC White Stop Bead with Mesh | Gives the render a clean, finished edge to stop against instead of a ragged cut |
| General stop points around the building | Stop Bead with Mesh | Same job as the white stop bead, used wherever a render run needs to end cleanly |
| Above window and door openings | Window Drip Bead with Mesh | Throws water clear of the reveal below instead of letting it track back under the render |
All five of these come in 2.5m lengths, built around the EPS board thickness, with a mesh flange already attached so it keys into the basecoat.
Corners: get this one right first
The corner bead is the trim people skip most often, usually on a gable or a return wall where the installer decides the mesh overlap alone will hold the corner. It will not. EPS render has almost no give at an edge, and without a bead under the basecoat the corner telegraphs a crack within a season or two, especially on a corner that catches the worst of the weather. Run the corner bead up every external corner before you basecoat, bedded into the same adhesive as the fibreglass mesh, and lap the wall mesh over its flanges rather than butting up against it.
Windows and doors: the drip bead is not optional
A window opening in an EWI wall has three sides that need a stop bead against the frame and a top edge that needs something different. Water running down the face of the wall above a window will find the top of the reveal if there is nothing to throw it clear, and once it gets behind the render at that one weak point it tends to keep coming back no matter how many times the sealant around the frame gets redone. The window drip bead sits over the top of the opening and throws that water off the wall instead of down into the reveal. It is a small, cheap trim and it is the difference between a window detail that stays dry and one that stains every winter.
Starter track: the line everything else follows
The starter track goes on before a single board is fixed. It sets the bottom line of the whole wall, so it needs to be fixed level, not just by eye - a track even slightly out of level puts every board above it out of true, and that shows up in the render finish at the top of the wall, not just the bottom. Set it with a laser or a long level, check it every metre or so as you fix it, and only then start boarding up from it.
One trim that is not for this job
The Perforated Aluminium Angle Bead looks similar to the EWI corner bead but it is an internal plastering trim, used on plasterboard or wet plaster corners inside the building, not under render outside. Using it outdoors will corrode; using the EWI corner bead indoors costs more than it needs to for the job. Keep the two separate when pricing a job that has both internal plastering and external insulation in the same quote.
Working out your trim list
Count linear metres, not square metres, for every trim: measure every external corner, every window and door head, every termination edge, and the full perimeter at starter track level, then divide by 2.5m lengths and round up. It is a five-minute job with a tape measure and it is the easiest way to avoid a second delivery charge for a few lengths of bead you missed the first time.
Send us your measurements
If you would rather we worked out the trim list for you, send your wall dimensions, corner count and window positions to sales@all4building.ie or call 085 868 8459, and we will put together a full materials list covering boards, basecoat, mesh and every trim the job needs.
Need materials for this job?
We deliver trade-quality building materials across Ireland. Call 021 487 6963 or message us on WhatsApp for a quote.
Shop now