Taping and Filling Plasterboard Joints Without Cracking
17 August 2026 · All4Building.ie team
The joint is the weak point, not the board
Plasterboard itself rarely fails. The joints between sheets are where cracks show up, usually within the first year, and almost always for the same two reasons: no tape was used under the filler, or the wrong product was used to fill the gap. A joint filled with skim coat and nothing else looks fine on the day but has no reinforcement to stop the board moving with the frame. Get the sequence right and it never becomes a problem.
Step 1: Tape every joint before you fill it
Tape is not optional, even on a tight, well-cut joint. It bridges the gap and spreads any small movement across a wider area instead of letting it open up as a single crack line.
For most jobs on standard plasterboard, a fleece (fliseline) tape is the easier option for anyone not skimming for a living. It is self-adhesive, does not need bedding into wet filler the way paper tape does, and it will not bubble if you are working on your own without someone holding the roll. We stock Fliseline Tape for Plasterboards, which covers standard butt and taper-edge joints.
Step 2: Choose the right filler for the joint
This is where most site crackers come from, using a finish skim product to fill a joint gap it was never designed to fill.
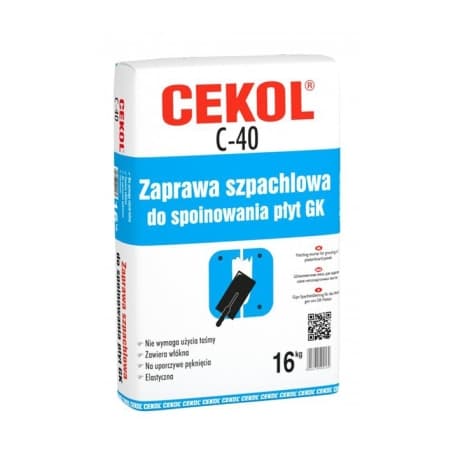
- Cekol C-40 Plasterboard Joint Filler 16kg is built for the job: filling and bedding tape into taper-edge and butt joints, and dealing with screw dimples. It has enough body to fill a gap without slumping.
- Cekol A-45 Polymer Finishing Skim Coat or Cekol GS-200 Gypsum Finish Skim Coat 20kg come after the joint is filled and taped, applied thinly over the whole wall (or just over the jointed and screwed areas for a "scrim and skim" finish) to level everything to one plane before paint or wallpaper.
Filler and finish skim are not interchangeable. Filler is for the gap and the tape. Finish skim is for the surface once the gap is already solid.
| Job | Product | Why |
|---|---|---|
| Bedding tape into a taper-edge joint | Cekol C-40 Joint Filler | Fills the recess, holds the tape, sands back true |
| Filling screw dimples | Cekol C-40 Joint Filler | Same product, small dabs, avoids a second material on site |
| Skimming the full wall for a smooth finish | Cekol A-45 or Cekol GS-200 | Thin coat over the whole surface, not just the joints |
| Reinforcing an external corner | Perforated Aluminium Angle Bead | Keeps the corner straight and knock-resistant |
Check the datasheet for exact coverage and number of coats for your board thickness and finish - it varies with how thick you are applying it and the state of the substrate, so we will not guess a figure here.
Step 3: Protect external corners properly
Internal joints get tape. External corners (window reveals, wall ends, opening returns) need something stiffer, because they take knocks that a taped joint alone will not survive. A Perforated Aluminium Angle Bead 2.5m sits over the corner and gets skimmed over, giving you a straight, durable edge instead of a rounded one that chips the first time a hoover or a ladder catches it.
A common mistake worth avoiding
Rushing the first coat of filler over tape before it has gone off, then sanding it back too aggressively, is the single most common reason a "finished" joint reappears as a hairline crack a few months later once the house has been heated through a winter. Let each coat do its job before the next one goes on, and do not chase a dead flat finish on the first pass - that is what the thin finishing skim coat is for.
Browse the full range in Joint Fillers & Wall Plasters if you need tape, filler and corner bead together, or the Suspended Ceilings section if you are starting from bare studs or a ceiling grid rather than just finishing existing boards.
Get your materials list sorted before you start
Send us the room dimensions, or a rough note of linear metres of joint and number of external corners, and we will put together a materials list so you are not making a second trip for tape or filler halfway through a job. In-stock orders go out within 7 working days, and delivery is free in Ballincollig and Cork City. Collection from us is by appointment only, so give us a shout first.
Call 085 868 8459 or email sales@all4building.ie and we will sort the list out with you.
Need materials for this job?
We deliver trade-quality building materials across Ireland. Call 021 487 6963 or message us on WhatsApp for a quote.
Shop now