Sanding plaster: getting the grit progression right
31 August 2026 · All4Building.ie team
The finish coat is not the last step, sanding is
A skim coat that looks flat while it is still wet can look completely different once it is dry, painted and lit from the side by a window or a downlighter. Trowel lines, slight ridges at joins, and small pinholes all telegraph through paint that has any sheen to it at all. Sanding is what takes those out before paint goes on, and it is where a lot of otherwise good plastering gets let down, either by skipping it, using one grit for the whole job, or going in too hard and scratching the surface instead of smoothing it.
Why one grit does not do the whole wall
Coarse abrasive removes material fast but leaves its own scratch pattern behind. Fine abrasive barely touches a trowel ridge but leaves a smooth surface once the ridge is gone. Using only a coarse grit gets the high spots down quickly but the wall will show sanding marks under paint. Using only a fine grit on a wall with real trowel lines just wears out the sandpaper without levelling anything. The way around this is to work through the grits in order, coarse to fine, so each stage removes the marks left by the one before it.
| Grit | Job on a skim coat |
|---|---|
| Abrasive Sanding Mesh 100 Grit | Knocking down obvious trowel ridges and high spots before anything else |
| Abrasive Sanding Mesh 150 Grit | General levelling once the worst ridges are gone |
| Abrasive Sanding Mesh 180 Grit | Fine levelling, removing the marks left by the 150 grit pass |
| Abrasive Sanding Mesh 220 Grit | Final pass before paint, smooth enough that it will not show under a lit wall |
Do not start at 220 on a wall with real trowel lines, and do not finish on 100. The final pass is what the paint sees, so the finer grit needs to be the last thing that touches the wall.
The float matters as much as the paper
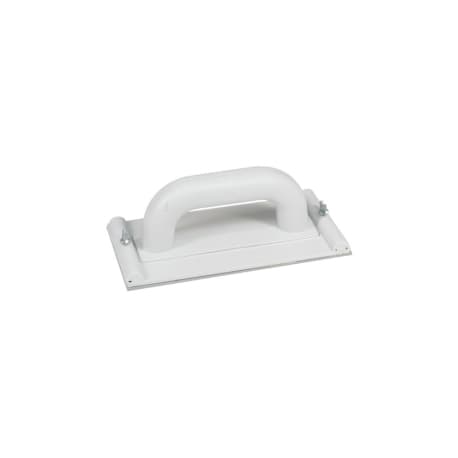
A flat, rigid sanding float is what keeps a wall flat rather than wavy. Hand-holding a sheet of abrasive mesh follows every dip and high spot on the wall because your hand flexes with the surface, which is the opposite of what you want. An Abrasive Sanding Float holds the mesh flat and rigid, so it cuts the high spots down and rides over the low spots without following them. Fit a fresh sheet of mesh to the float for each grit stage rather than trying to make one sheet do the whole job, a clogged or worn sheet stops cutting properly long before it looks obviously worn out.
Sand at the right time, not too soon
Skim coat needs to be properly dry before it is sanded, not just firm to the touch. Sanding a coat that has only gone off on the surface tends to gum up the abrasive mesh instead of cutting cleanly, and it can pull the surface rather than smoothing it. This varies with the room, the finish product and how thick the coat was applied, so check the datasheet for the finish plaster you used rather than working to a fixed number of hours.
Cutting down the dust
Sanding a full room of skim coat generates a lot of fine dust, and it settles everywhere, not just in the room being worked on. If dust control is a real issue, for example an occupied house or a room next to fitted floors, a dustless finish plaster is worth the small extra cost. Cekol F-16 Dustless Finishing Skim Coat and Cekol GS-250 Dustless Gypsum Finish Plaster 1-10mm are formulated to sand with far less airborne dust than a standard finish coat, which matters more on an occupied job than a shell build where dust sheets and ventilation are already in place.
For the full range of skim coats, joint fillers and primers, see Joint Fillers & Wall Plasters.
A common mistake worth avoiding
Sanding the whole wall at one grit because swapping sheets feels like a waste of time, then wondering why the wall shows a scratch pattern once the first coat of paint goes on, especially anything with a sheen. The four grits are cheap. Repainting a wall because the sanding marks show through is not. Work through them in order and the last pass is the only one the paint will ever see.
Get your materials list sorted before you start
Send us the room dimensions or the square metreage you are skimming, and we will put together a materials list covering finish plaster, sanding mesh and floats so you are not making a second trip mid-job. In-stock orders go out within 7 working days, and delivery is free in Ballincollig and Cork City. Collection is by appointment only, so give us a shout first.
Call 085 868 8459 or email sales@all4building.ie and we will sort the list out with you.
Need materials for this job?
We deliver trade-quality building materials across Ireland. Call 021 487 6963 or message us on WhatsApp for a quote.
Shop now